


Navigate to the Windows 10 Advanced Startup Options menu. There are many ways to get to Windows 10 Advanced Startup Options. On many laptops, hitting F11 as soon as you power on will get you there. Booting off an install disk and hitting Next then Repair will do the job too.Restart the computer and click on Troubleshoot, then select Advanced Options and click on Startup Repair. Follow the prompts and choose an account. The repair process will scan the computer and attempt to fix any startup problems.Select Start > Settings > Update & Security > Troubleshoot > Additional troubleshooters, or select the Find troubleshooters shortcut at the end of this topic, and then select Additional troubleshooters. Select the type of troubleshooting you want to do, then select Run the troubleshooter.
How to repair Windows 10 without reinstalling : Click "Troubleshoot > Advanced Options > Startup Repair > Windows 10". Then, the Startup will scan your computer and repair any loading problems it detects. When the process finishes, boot your Windows 10 computer to see if it goes well.
How to boot PC into repair mode
From the Windows Desktop:
- Select Start, Power, and then press and hold the Shift key while clicking Restart.
- Select Start, Settings, Update, and Security, Recovery. Under Advanced startup, click Restart now.
- At the command prompt, run the Shutdown /r /o command.
- Use the following steps to boot the System.
How do I turn on repair mode : Access Repair Mode
- Open your phone's Settings app.
- Tap System. Repair mode.
- Follow the on-screen prompts to turn on Repair Mode.
- Enter your phone's security pin, password, or pattern (the same code as your lock screen). Do not share the pin, password, or pattern with the technician.
- Allow the system to reboot.
Choose to Troubleshoot > Advanced Options > Startup Settings. After that, the computer should restart, and then you can see a list of options. Next, choose Disable early launch anti-malware protection. After that, restart your PC and check if the Windows Automatic Repair not working issue has been resolved.
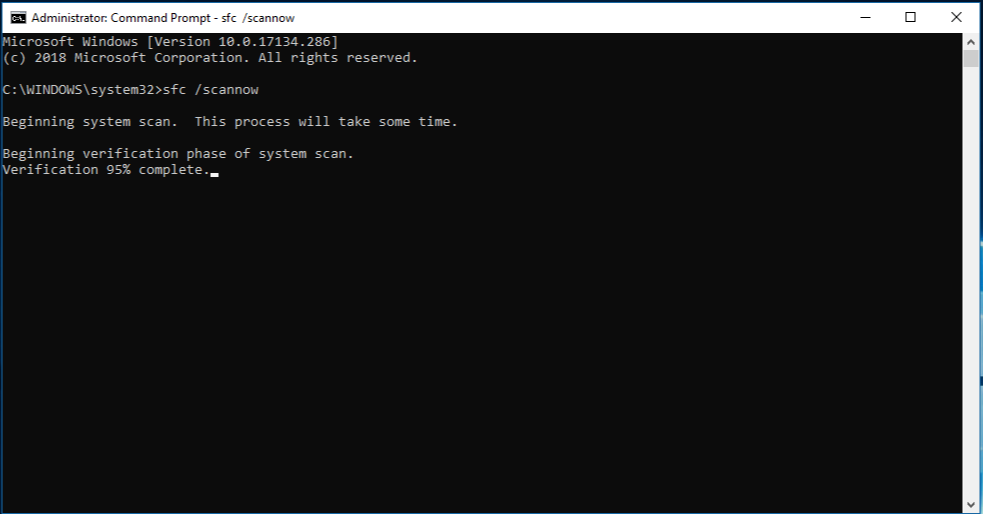
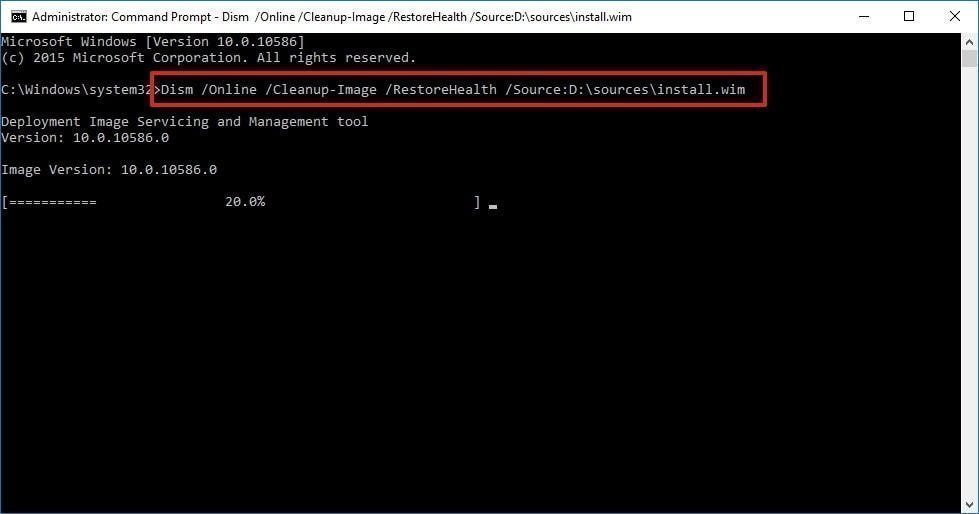
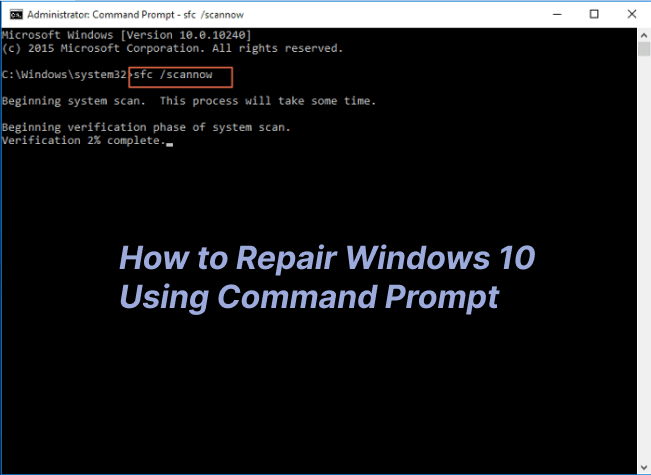
In the command prompt window, type SFC /scannow and press Enter . The system file checker utility checks the integrity of Windows system files and repairs them if required. After the process is complete, reboot the computer.
How to put a PC in repair mode
How to initiate startup repair using the Settings app in Windows
- Open the Settings app.
- Go to Update & Security.
- Select the Recovery tab.
- Under Advanced Startup, click Restart Now.
- After the computer reboots, go to Troubleshoot > Advanced Options > Startup Repair.
How to proceed
- Step 1: Click on the Start menu and go to the Settings option from the search field.
- Step 2: Under the Settings menu, click on Update & Security and choose the Recovery option.
- Step 3: Next, tap on the Get Started button under Reset this PC.
- Step 4: Pick a selection for continuing ahead.
Note: Performing a system restore will not change your personal files but might remove recently installed applications and drivers. Select [Advanced options]① on the "Startup Repair" screen.
System settings – Outdated drivers, incorrect BIOS settings, or incompatible programs can all cause the Automatic Startup Repair to fail. Not enough available space – Your computer might not have enough space or RAM to install new updates or fixes from Windows.
How to repair Windows with boot disk : To use the system repair disc
- Insert the system repair disc into your CD or DVD drive.
- Restart your computer using the computer's power button.
- If prompted, press any key to start the computer from the system repair disc.
- Choose your language settings, and then click Next.
- Select a recovery option, and then click Next.
Why can’t startup repair work : As mentioned, bad sectors and file system errors on your hard drive may be why you receive the error message "Startup Repair cannot repair the computer automatically". Running CHKDSK can check and repair your disk errors, including bad sectors and file system errors.
How to fix startup repair couldn’t repair your PC
Fixed: Automatic Startup Repair Couldn't Repair Your PC
- Restart Your Computer.
- Boot in Safe Mode.
- Disable Early Launch Anti-Malware Protection.
- Disable Automatic Restart After Failure.
- Use the "fixboot" and "chkdsk" Commands.
- Run the System File Checker (SFC Scan)
- Run the DISM Tool.
- Repair the Boot Configuration Data (BCD)
:max_bytes(150000):strip_icc()/windows-7-startup-repair-4-580711653df78cbc28c6c546.jpg)
Method 1: Startup repair tool
- Start the system to the installation media for the installed version of Windows.
- On the Install Windows screen, select Next > Repair your computer.
- On the Choose an option screen, select Troubleshoot.
- On the Advanced options screen, select Startup Repair.
Computer. Make sure your computer is shut. Down then press on a power button and wait when it's going to start booting. Up once you get to windows logo. Press power button. Now turn it off. Now we
How to repair corrupt Windows 10 using cmd : In the command prompt window, type SFC /scannow and press Enter . The system file checker utility checks the integrity of Windows system files and repairs them if required. After the process is complete, reboot the computer.